Enable Keyboards InKDE
Initial configuration
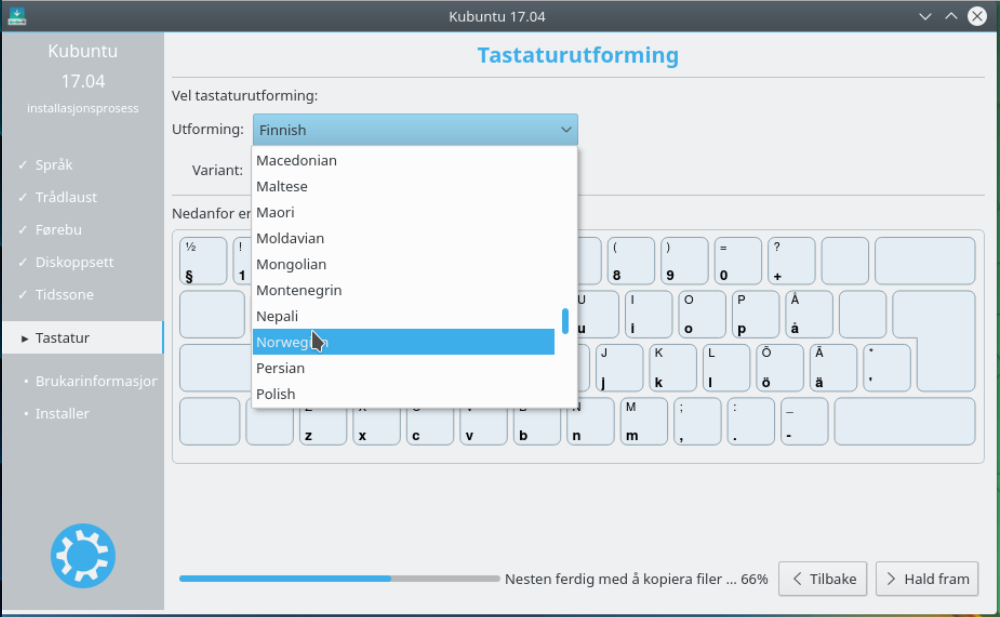
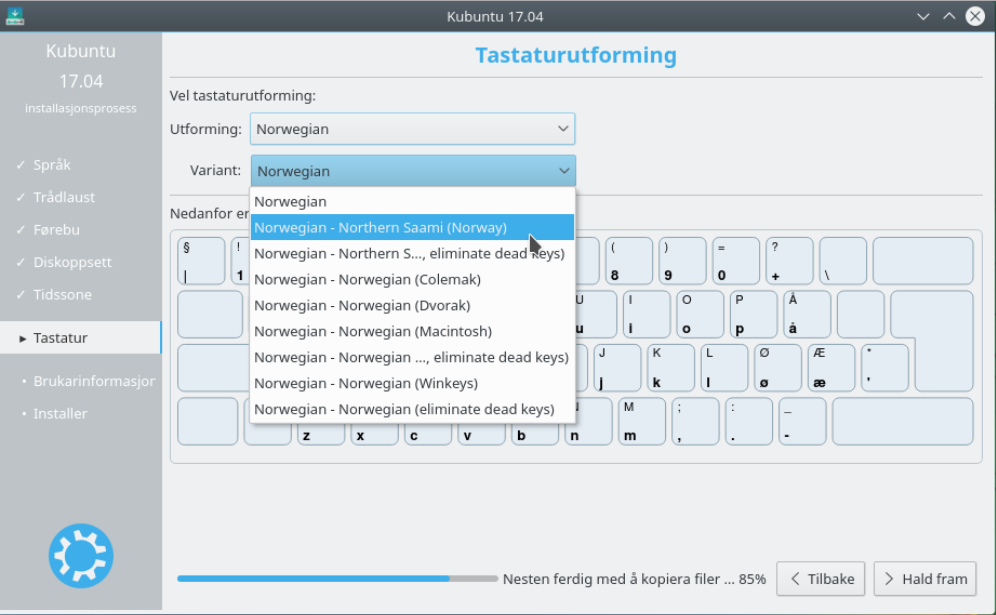
If one only needs one keyboard layout, one can choose to add it during the initial setup of the machine, as seen in the screen shots below:
- First, choose the major keyboard layout:
- Then choose one of the available variants for that layout:
Adding more keyboard layouts
To add additional keyboard layouts in KDE, follow these steps:
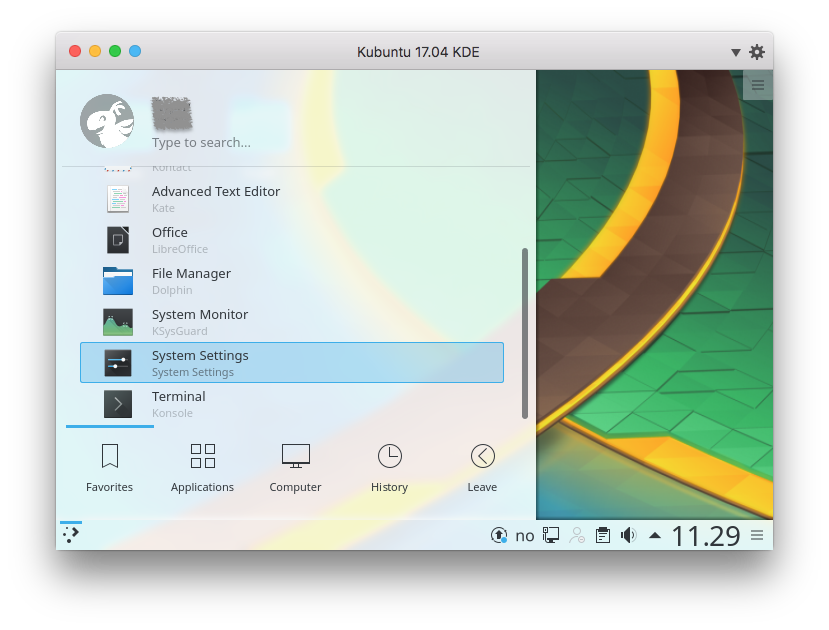
- Click on the KDE menu, then select System Settings:
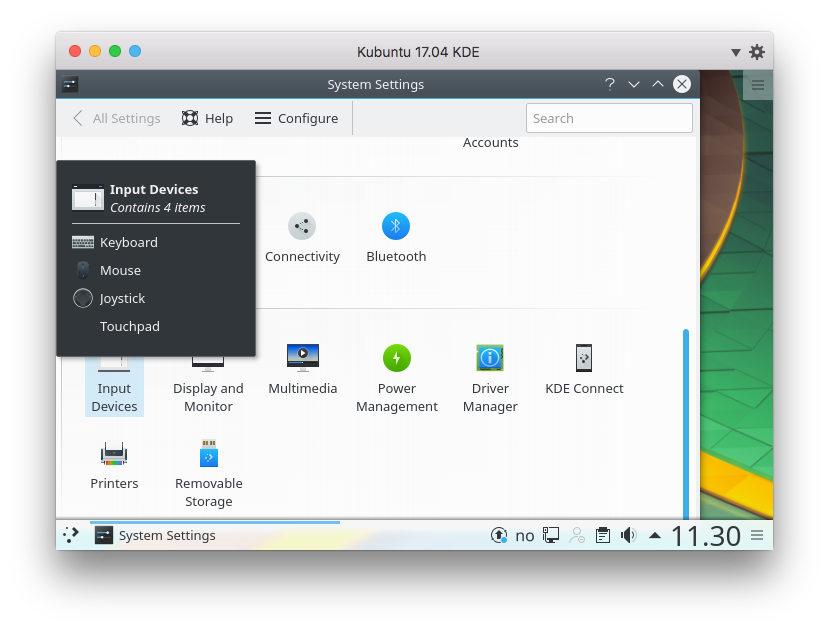
- Within System Settings, click on Input Devices:
- Select the Keyboard tab, and then the Layouts tab. To be able to add
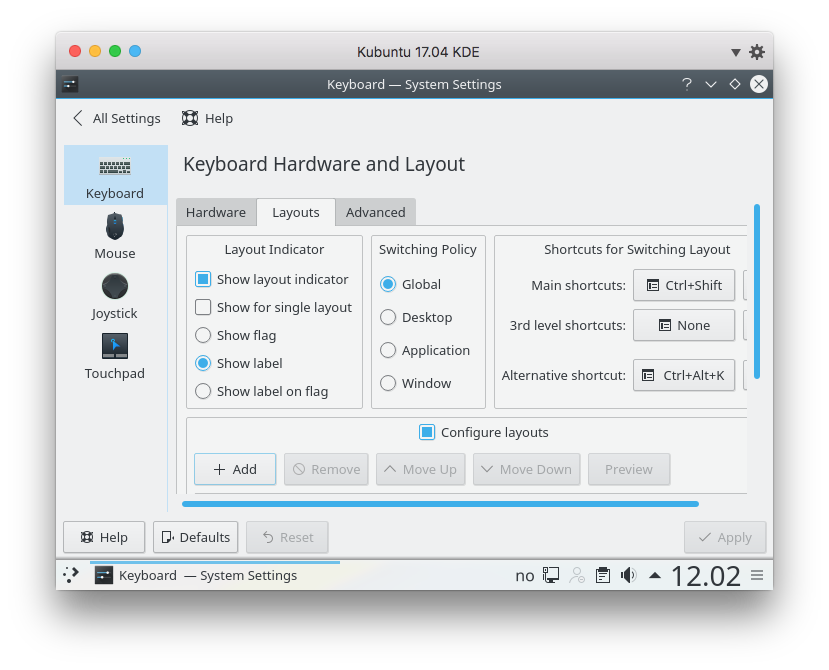
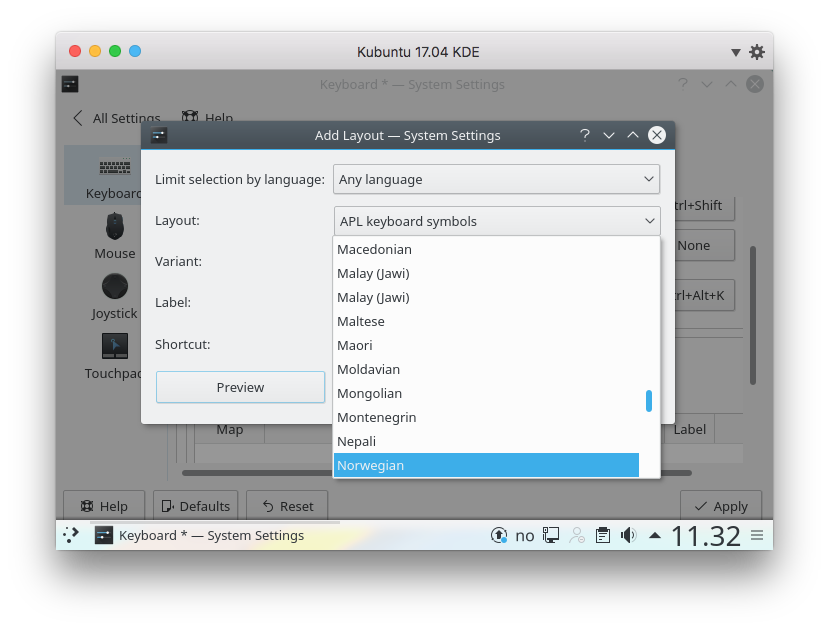
- Make sure that the top drop-down menu says Any language, and in the
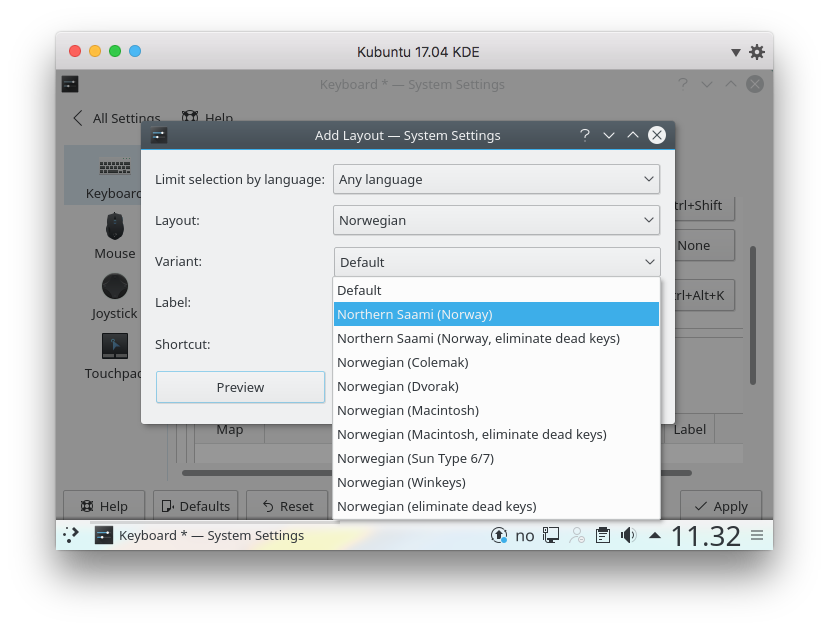
- In the Variant: drop-down menu select the
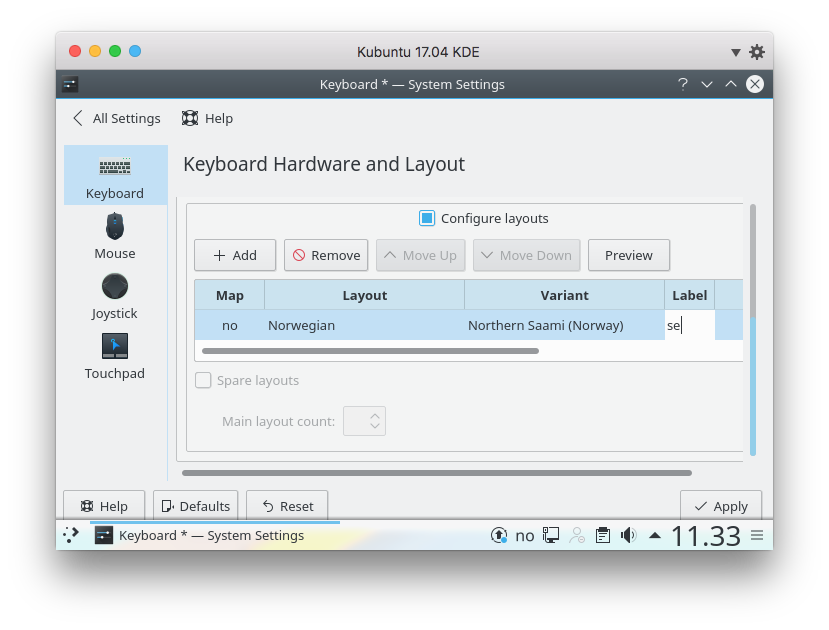
- Edit the label (used in the KDE environment to signal which keyboard layout
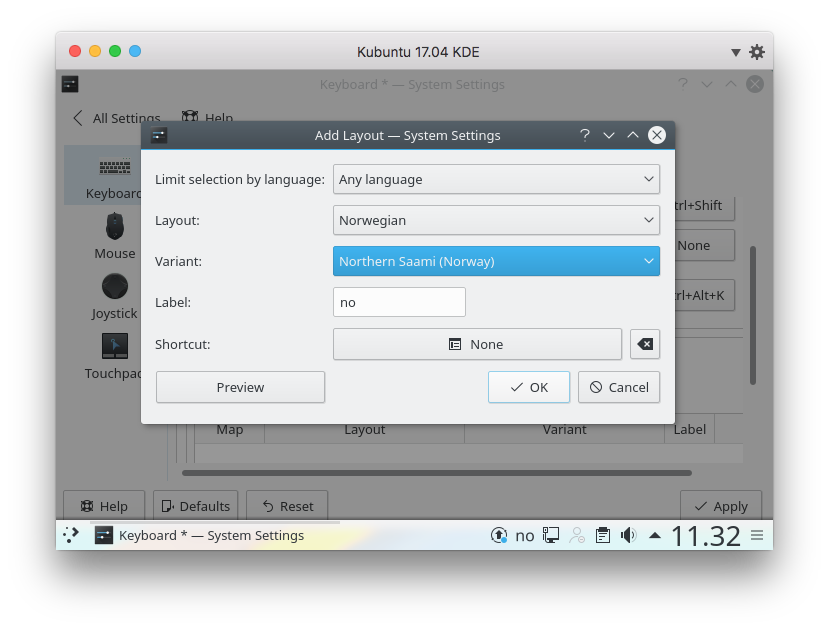
- If you forgot to change the label, you can still change it in the main
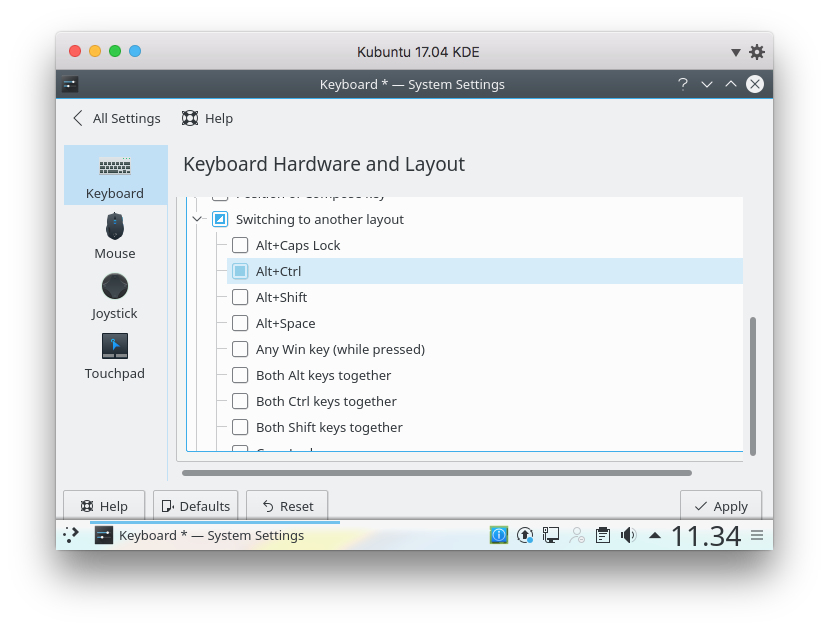
- Finally, if you want to have a keyboard shortcut to easily switch between
- When done, the keyboard layout label is visible in the bottom tray; the full
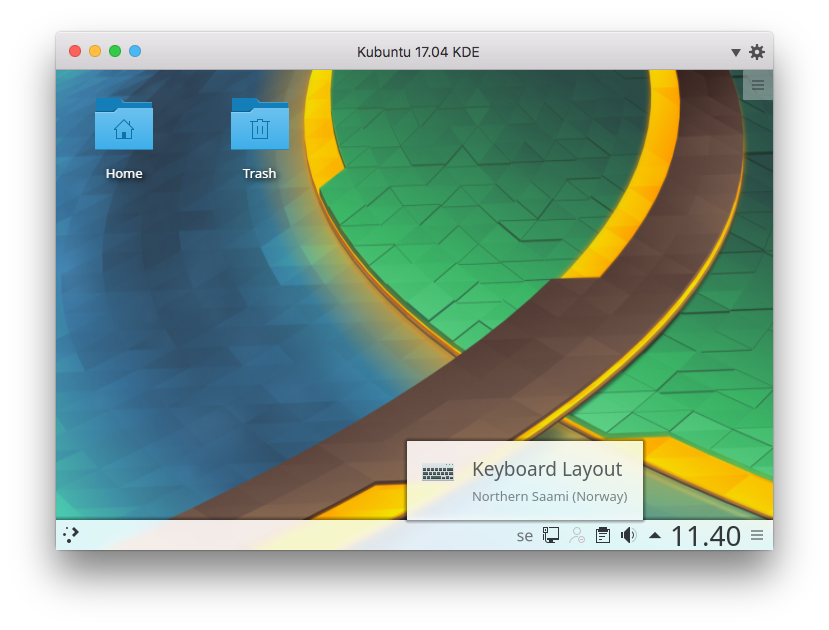
- Switch layout by clicking on the label or using the keyboard shortcut.

